Getting started
This guide details the essential steps to integrate the ROOK SDK into a native iOS application, specifying minimum requirements such as Xcode 16 and iOS 13 or higher. For dependency management, engineering teams can choose between Swift Package Manager and CocoaPods. The technical implementation mandates enabling the HealthKit capability within the project to allow background data processing through fetch and delivery features. Additionally, privacy descriptions must be explicitly declared in the property list file to authorize access to health metrics. Initial configuration is handled by a singleton-based manager class, where client credentials are set and automatic synchronization mechanisms are activated during the application launch.
The Fundamentals section of this documentation provides a tour of the most important aspects of the ROOK SDK. It covers everything you need to know to integrate us into your application.
Minimum requirements
ios>= 13.0XCode>= 26.0
If you're developing an application from scratch, we recommend exploring our application demo. Github demo app
Installation
Swift Package Manager
- To add a package dependency to your Xcode project, select File > Swift Packages > Add Package
- In the prompt that appears, select the Rook GitHub repository:
https://github.com/RookeriesDevelopment/rook-ios-sdk.git
- Select the version of Rook you want to use. For new projects, we recommend using the newest version of Rook.
Once you finish, Xcode will begin resolving your package dependencies and downloading them in the background.
Cocoapods
Firebase supports installation with CocoaPods in addition to Swift Package Manager.
ROOK's CocoaPods distribution requires Xcode 26.0 and CocoaPods 1.12.0 or higher. Here's how to install ROOK using CocoaPods:
- Create a Podfile if you don't already have one. From the root of your project directory, run the following command:
pod init
- To your Podfile, add the Rook pod to use in your app.
pod "RookSDK"
- Install the pods, then open your .xcworkspace file to see the project in Xcode:
pod install --repo-update
open your-project.xcworkspace
Configure Project
We need to add Apple Health Kit Framework to our project in order to that please:
-
Open your project in Xcode.
-
Click on your project file in the Project Navigator.
-
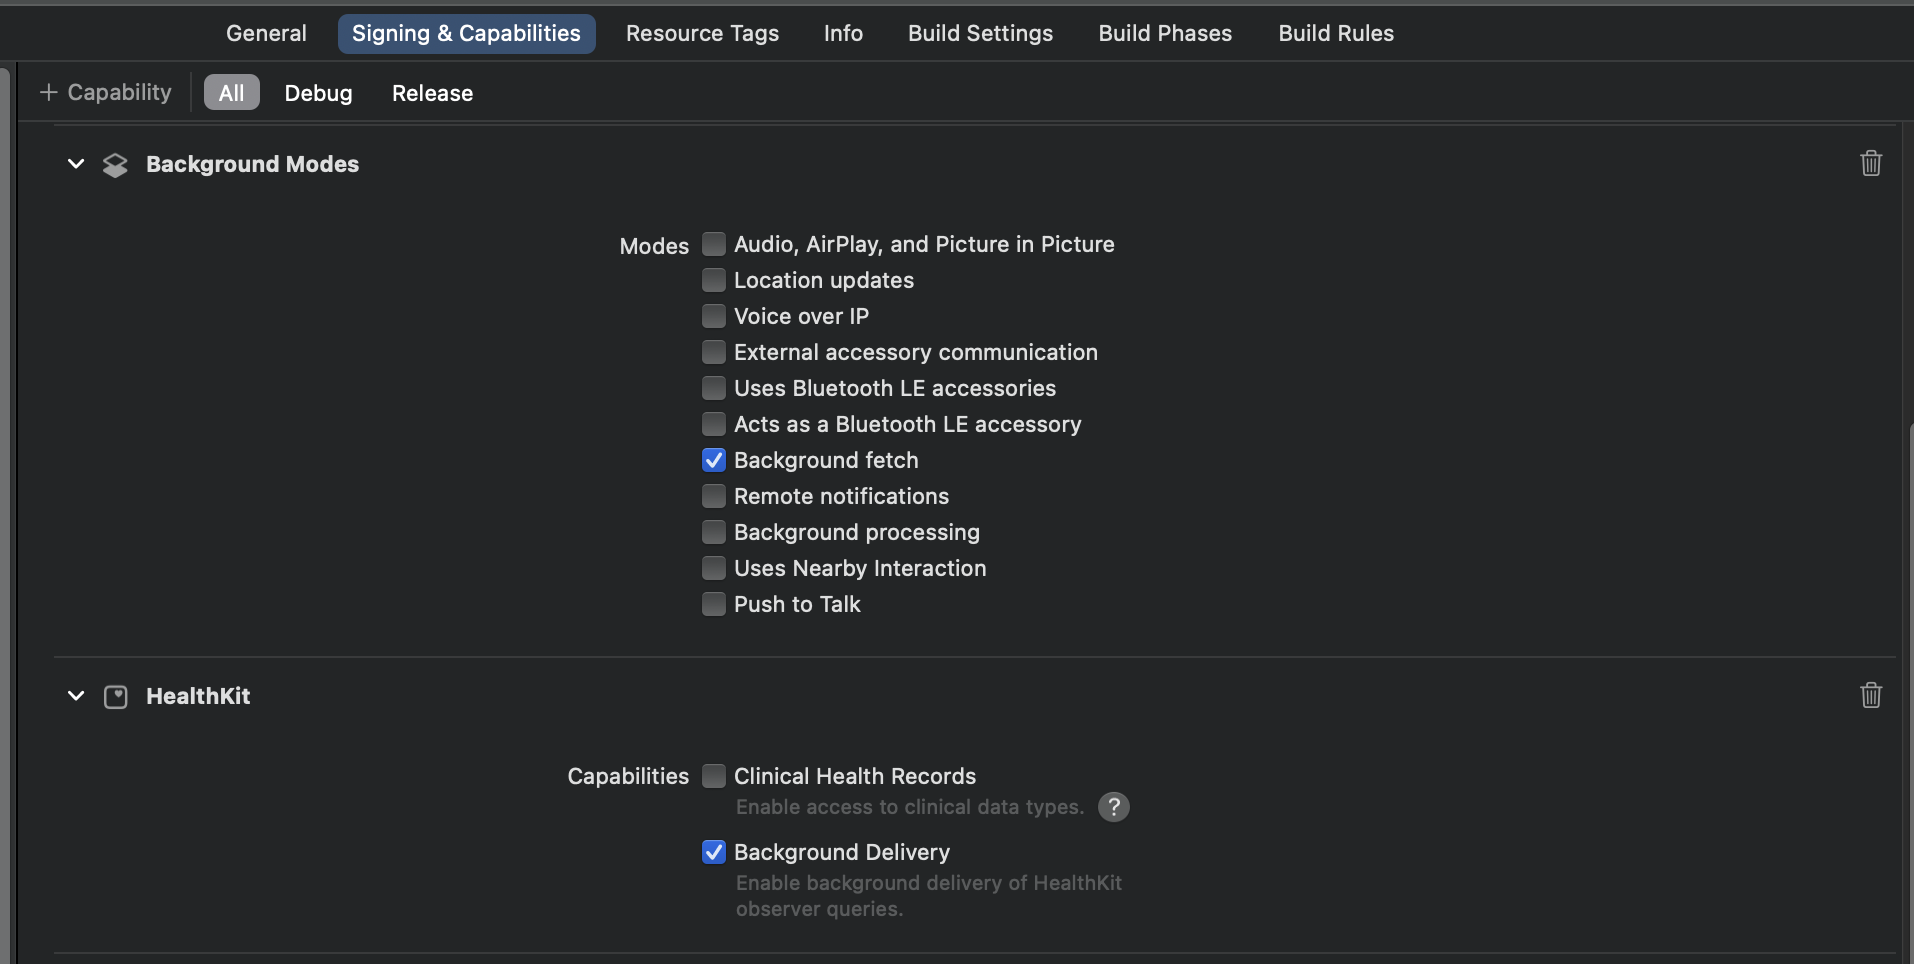
Select your target and then click on the "Signing Capabilities" tab.
-
Click on "Add Capability" and search for "HealthKit"
-
Enable Background delivery
-
Click on "Add Capability" and search for "Background Modes"
-
Enable Background fetch from Background Modes.
Additionally add the following to the info.plist
<key>NSHealthShareUsageDescription</key>
<string>This app requires access to your health and fitness data in order to track your workouts and activity levels.</string>
<key>NSHealthUpdateUsageDescription</key>
<string>This app requires permission to write healt data to HealthKit.</string>
Initialize Rook in your app
RookConnectConfigurationManager Use this class to configure and Init the sdk.
This class conforms the singleton pattern, to access this class use the shared property.
It is recommended to configure and init rook sdk in in your app delegate's
application(_:didFinishLaunchingWithOptions:) method:
func application(_ application: UIApplication,
                   didFinishLaunchingWithOptions launchOptions: [UIApplication.LaunchOptionsKey : Any]? = nil) -> Bool {
    RookConnectConfigurationManager.shared.setEnvironment(.sandbox)
    RookConnectConfigurationManager.shared.setConfiguration(
      clientUUID: "YOUR-CLIENT-UUID",
      secret: "YOUR-SECRET",
      bundleId: "YOUR-CUSTOM-BUNDLE-ID"
      enableBackgroundSync: true,
      enableEventsBackgroundSync: true)
    RookConnectConfigurationManager.shared.initRook { result in
    switch result {
      case .success(let initResult):
        debugPrint("init result rook SDK \(initResult)")
      case .failure(let error):
        debugPrint("Error Init SDK \(error)")
        if let rookError: RookError = error as? RookError {
          debugPrint("error \(String(describing: rookError.localizedDescription)) code \(rookError.code)")
        }
      }
    }
    RookBackGroundSync.shared.setBackListeners()
    return true
  }