Data Authorization
Authorization is the mandatory first step to accessing health data. The platform supports two methods: API-based authorization via browser interfaces for providers like Garmin and Fitbit, and mobile-based authorization via SDKs for aggregators like Apple Health. Production implementations require a connection page utilizing the /authorizer endpoint.
Authorization is the first step to accessing health data through ROOK. Depending on the type of data source, the authorization process varies. This guide explains the two types of authorizations:
- API-Based Data Sources: Platforms such as Fitbit, Garmin, and Oura, where users authorize access via the data source's authorization page.
- Mobile-Based Data Sources: Platforms such as Apple Health and Health Connect, where users grant access directly on their mobile devices.
Both types of authorization enable data extraction and delivery through ROOK.
We recommend integrating both options. Far from being mutually exclusive, they complement each other by encompassing more data sources.
API-Based Data Sources
For API-based data sources, users authorize ROOK to access their health data via a browser. The setup can be achieved through the following methods:
Connection Page
The custom connections page is an interface developed by the client. Its purpose is to manage the authorization flow for API-based and SDK-based data sources, interacting directly with our infrastructure through the authorizer endpoint.
Build the connections page
The client must build this view following a flow of three main steps.
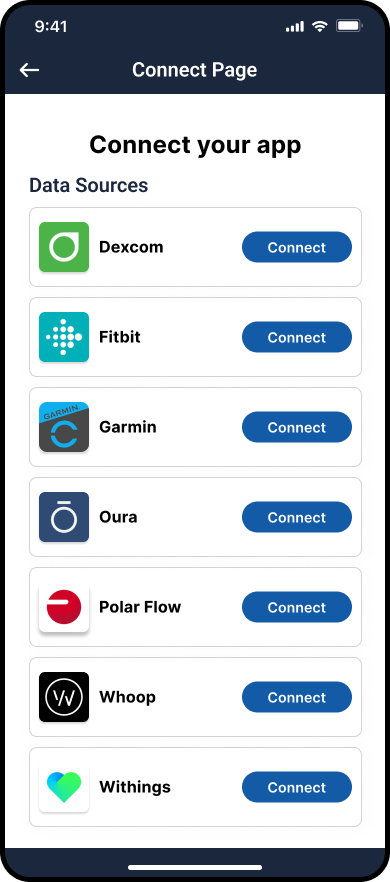
Step 1: Interface design
Create a web page or app view with buttons for each data source. Each button should link to the authorization_url provided by the /authorizer endpoint.
Connections View Example: 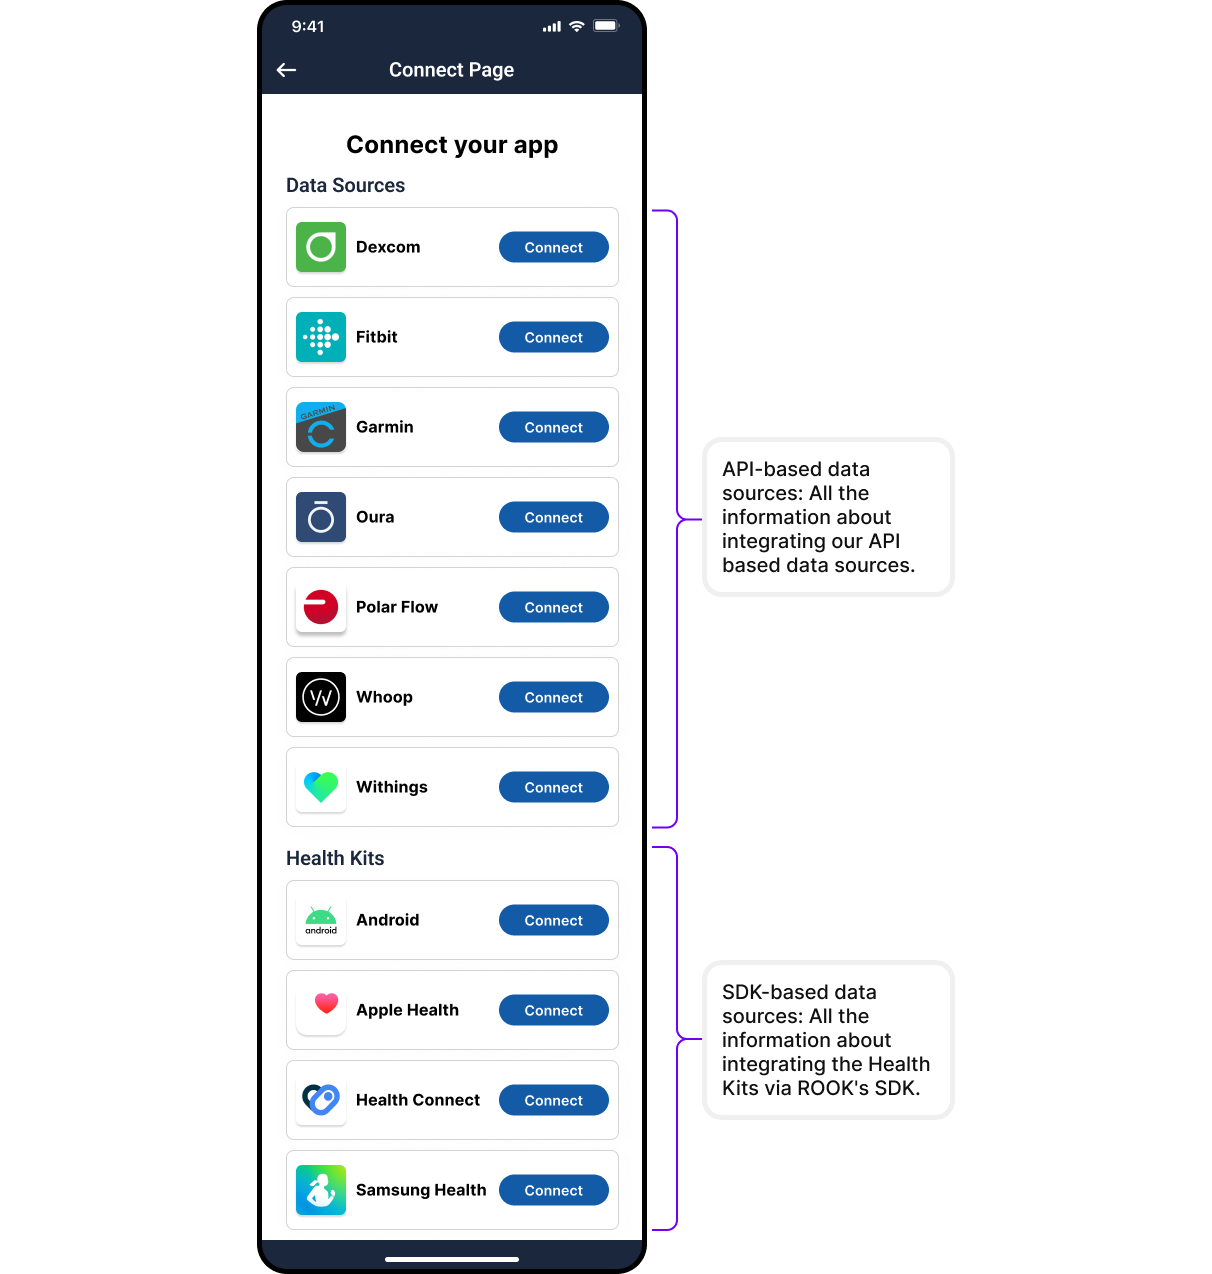
Step 2: Use the /authorizer Endpoint
Returns the user’s authorization status and, if not authorized, an authorization URL to start the process.
Request:
GET /api/v1/user_id/{user_id}/data_source/{data_source}/authorizer
Authorization: Basic {Base64Encoded(client_uuid:secret_key)}
Parameters:
- user_id: A unique identifier for the user (1–50 characters).
- data_source: The data source to be authorized. Allowed values: Garmin, Oura, Polar, Fitbit, Withings, Whoop, Dexcom.
- redirect_url (Optional): A custom URL for redirecting users after authorization.
Example Response:
{
"data_source": "Fitbit",
"authorized": false,
"authorization_url": "https://www.fitbit.com/oauth2/authorize?response_type=code&client_id=23R2..."
}
For full details, refer to the API Reference.
Step 3: Handle Redirection
After authorization, users are redirected to the callback URL specified in the request. More information on setting up a callback URL can be found in the Callback URL Setup section.
Certain data sources, such as Whoop and Dexcom, require additional integration steps. Contact ROOK Support for assistance.
ROOK Connection page (Only in sandbox)
ROOK provides a pre-configured ROOK Connections Page for sandbox testing:
- Purpose: Simplifies sandbox testing by offering a ready-to-use webpage for user authorization.
- Configuration: Data sources displayed on the Connections Page can be managed through the ROOK Portal.
The ROOK Connections Page is intended for sandbox testing only. For production, a custom page must be created using the
/authorizer endpoint. See the API Reference for details.
Mobile-Based Data Sources
For mobile-based data sources, such as Apple Health and Health Connect, authorization occurs directly on the user’s device.
Authorization Process
- SDKs for Custom Apps:
ROOK SDKs can be used to invoke authorization pop-ups that allow users to grant access to their health data.
- Supported platforms: iOS (Apple Health) and Android (Health Connect).
- Integration: The SDK can be added to an app, and authorization functions can be triggered. Details are available in the SDK Documentation.
ROOK Extraction App
For clients without mobile development resources, the ROOK Extraction App provides a production-ready solution.
- Users scan a QR code generated via the ROOK API to initiate authorization.
- The app manages data extraction and authorization pop-ups automatically.
More information can be found in the ROOK Extraction App section.
Revoke User Authorization
To revoke ROOK’s access to a user’s health data, the Revoke endpoint can be used:
Request:
POST /api/v1/user_id/{user_id}/data_sources/revoke_auth
Authorization: Basic {Base64Encoded(client_uuid:secret_key)}
Revoking access disconnects the user from all associated data sources for the specified client. If the same account is shared across multiple clients, other clients will retain their access until it is explicitly revoked for each one.
When revoking authorization from a data source, whether through the /revoke-authorization endpoint or directly via the provider’s portal, the process may not be immediate. Some providers may take several hours to complete the revocation, during which data may continue to be temporarily transmitted to ROOK. This behavior depends on the provider and is not controlled by ROOK.