ROOKConnect Quickstart
This guide details the execution phase of the integration after configuring the ROOK Portal. It covers user authorization strategies (API vs. Mobile), data flow validation using the built-in JSON Simulator, and the technical requirements for safely transitioning from the sandbox environment to production.
Once the portal configuration is complete and the integration architecture is defined, the end-to-end integration flow must be executed. The objective of this phase is to validate the complete data pipeline in the sandbox environment before releasing the application to real users.
Step one: Connect users
With the credentials and webhook configured in the ROOK Portal, the next step is to test user connection. Users must authorize the platform to access their health data through API-based or SDK-based sources.
The clients must build a custom web connection page (To desktop or mobile app) using the specific authorizer endpoint of the data source. This approach guarantees full brand control and does not rely on pre-configured portal interfaces.
Once the user authorizes access, the engine begins processing and delivering data to the configured webhook.
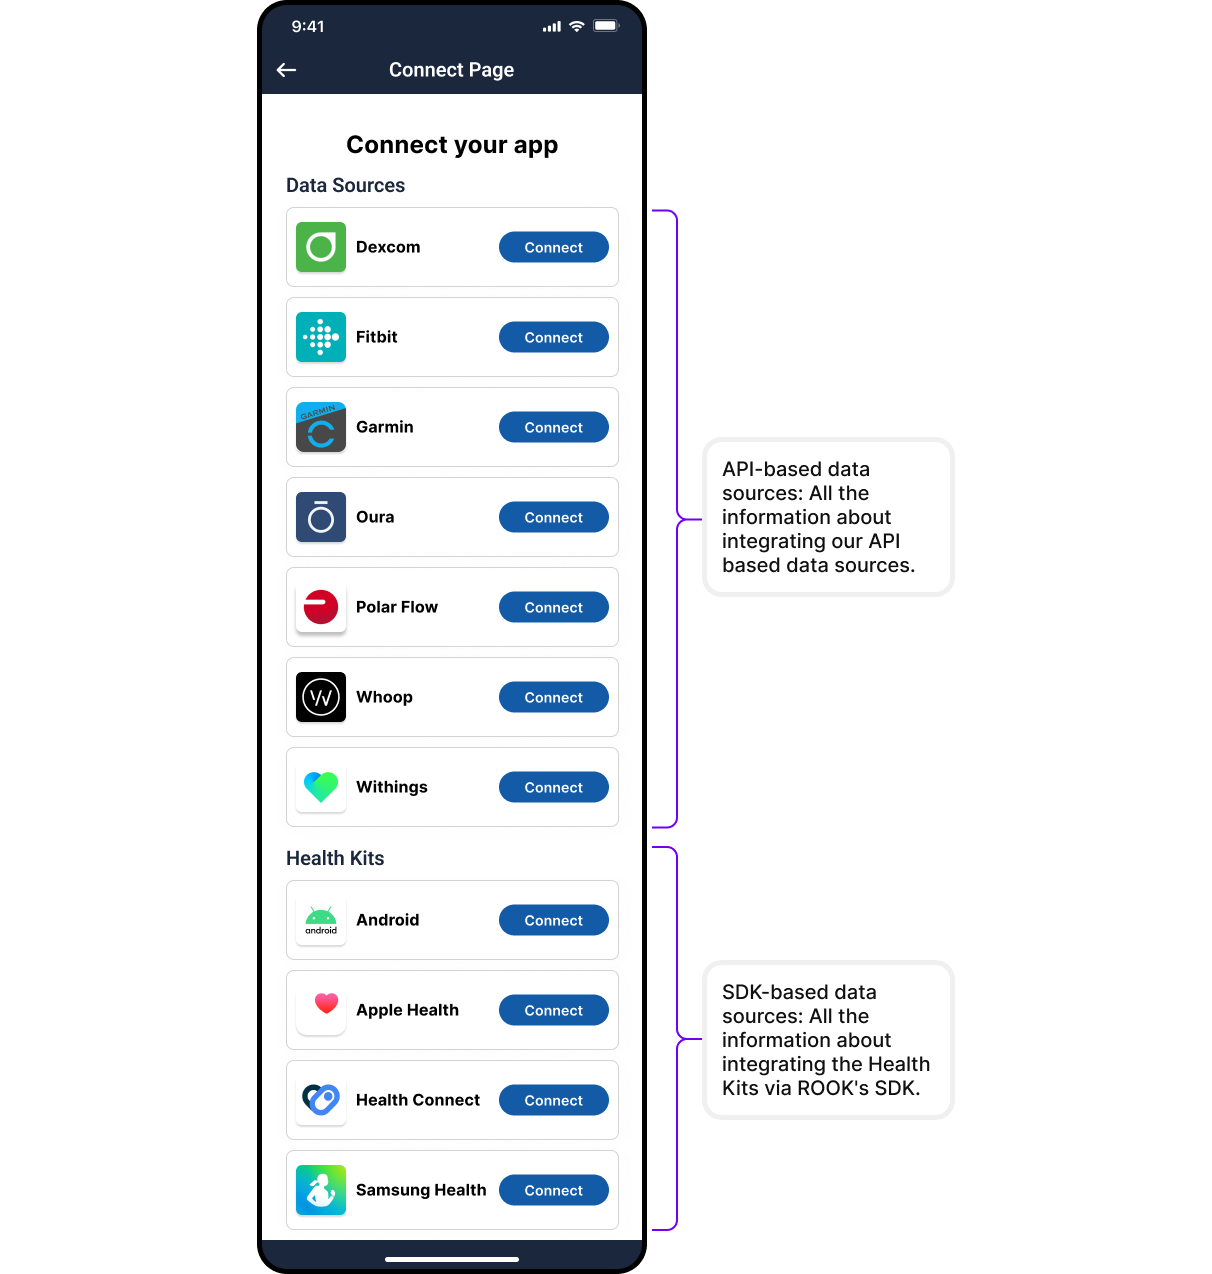
ROOK provides a test connections page for the sandbox environment; this connections page has API-based data sources available and is not available for production.
API-based sources
For API-based sources (such as Fitbit, Garmin, or Oura), the system presents an authorization view where users grant access to their health metrics. Upon authorization, the platform establishes the connection and begins data extraction.
Mobile-based sources
For mobile-based sources (such as Apple Health, Health Connect and Samsung Health), the client develops their own application by integrating our SDKs, which handle both the authorization and data extraction processes natively.
ROOK Extraction App
Alternatively, clients can utilize the pre-built ROOK Extraction App, which automatically manages user authorization and data synchronization without requiring custom mobile development.
Step two: Validate the data flow
After a test user is connected, the backend team must verify that the data payload arrives correctly at the configured webhook.
The team must confirm that:
- Clients can also perform on-demand queries to the ROOK API to retrieve specific user health data. However, using the API as the main method for continuous data retrieval is not recommended for Production environments.
- Use the reference documentation at Data Types to ensure that incoming payloads match the expected structures for summaries and events.
- The JSON payload matches the documented schema structure.
Using the JSON Simulator
To accelerate development, the portal includes a JSON Simulator. This tool is the fastest way to validate the integration pipeline without relying on physical wearables or generating real data. It allows developers to simulate, visualize, and send realistic JSON payloads directly to the configured data webhook.
Before starting, the project must have an active data webhook. If none exists, the portal will redirect the user to the configuration settings.
Access the JSON Simulator
Navigate to Tools → JSON Simulator in the portal. The interface will display the data webhook status:
- Active webhook: Testing can proceed.
- Inactive webhook: JSON delivery is disabled until the endpoint is webhook. The simulator automatically validates the webhook to prevent failed test runs.
Select the data to simulate
The simulator generates JSON payloads using official data structures and applies the specific configurations defined in the portal. The developer can configure three main parameters:
- Data source: The simulated provider.
- Health pillar: Displays only the pillars compatible with the selected source (Physical Health, Body Health, or Sleep Health).
- Data structure: Enables specific payload types based on the pillar (Examples: Summaries, activities, step events, or heart rate data).
Generate and deliver the payload
By clicking "Generate JSON", the simulator builds a realistic payload that includes a generic user_id and complete key-value pairs without null values, making it ideal for testing database pipelines and dashboards.
Once generated, the developer can:
- Review the JSON in a human-readable format.
- Copy it to the clipboard or download it as a file.
- Send to Data Webhook: If the webhook is active, clicking this option pushes the payload directly to the client's backend. The portal will display an immediate success or error response, enabling end-to-end validation without hardware.
Step three: Transition to production
When the integration pipeline is fully validated in the sandbox environment, the organization must request the enablement of the production environment.
Upon activation, the engineering team must:
- Generate new, production-specific credentials.
- Configure the live production webhooks.
- Update the backend environment variables to use production credentials exclusively.
Using sandbox credentials in the production environment is invalid and will return a 401 Unauthorized error when attempting to authenticate with our API. Ensure strict separation of environment variables.